
Originally published in 2013, updated in 2023 with new info and images.
Over the years I’ve acquired a decent collection of pedals, and while it was easily manageable when I only had a wah and overdrive pedal, once the rest of them rolled in I found myself tangled in cables and power adaptors. I knew I needed a pedalboard but I also knew if I could afford one, I’d use that money to buy a new pedal instead.
Fast forward a few weeks and I happened upon a post at the harmony central forums about a guy who constructed a pedal board using a $10 shelf unit from IKEA. The shelf in question is called a GORM (who the heck names these things?) and this cheap DIY pedalboard has inspired literally hundreds of people to create their own.
2023 Update: The GORM shelf is no longer in production at IKEA, but you can get the HEJNE shelf, which is more or less the same shelf.

I will now share with you my own DIY odyssey with the Gorm pedalboard, and I hope it inspires you to do the same.
Tools Needed
- GORM shelf (now HEJNE)
- Sandpaper
- Paint
- Saw
- Hammer/Nails
- Velcro tape
- Patch cables
- Pedals

First thing you need to do is pay a visit to your local IKEA and pick up a GORM shelf in either 77 x 31cm ($15) or 77 x 51cm ($20). They come in packs of two. The smaller one has three instead of five planks of wood. I bought the larger one, as you can see in the pic. The thing looks a little plain and needs a bit of work, but you can no doubt see the potential.

After you’ve purchased and taken home your GORM shelf it’s time to sand the hell out of it. This is to ensure a smooth surface for the paint job you hopefully plan to do. Use whatever grit sand paper you want, so long as you make sure you do a real good job getting a fine layer of that wood finish off the board.

Next you want to paint the thing. You can use spray paint if you like but I opted to use house paint because it’s thicker and produces a nicer overall finish than spray paint. If you use house paint make sure to use a roller as using a paint brush will only be a pain in the ass and will also result in an uneven finish. Be sure to choose a colour that suits you as this is one of the most personal steps in the whole process. I chose a cream white to match my amp cabinet, and also because I enjoy the contrast it has against the black velcro.

Next step is to get the other shelf that came in the set and saw off one of the planks. This plank will be used to raise the pedalboard at a slight angle so the pedals at the back of the board are as reachable as the pedals in the front. You might need a hammer to remove the nails once you’ve taken the plank out. Go ahead and sand/paint this piece of wood as well.

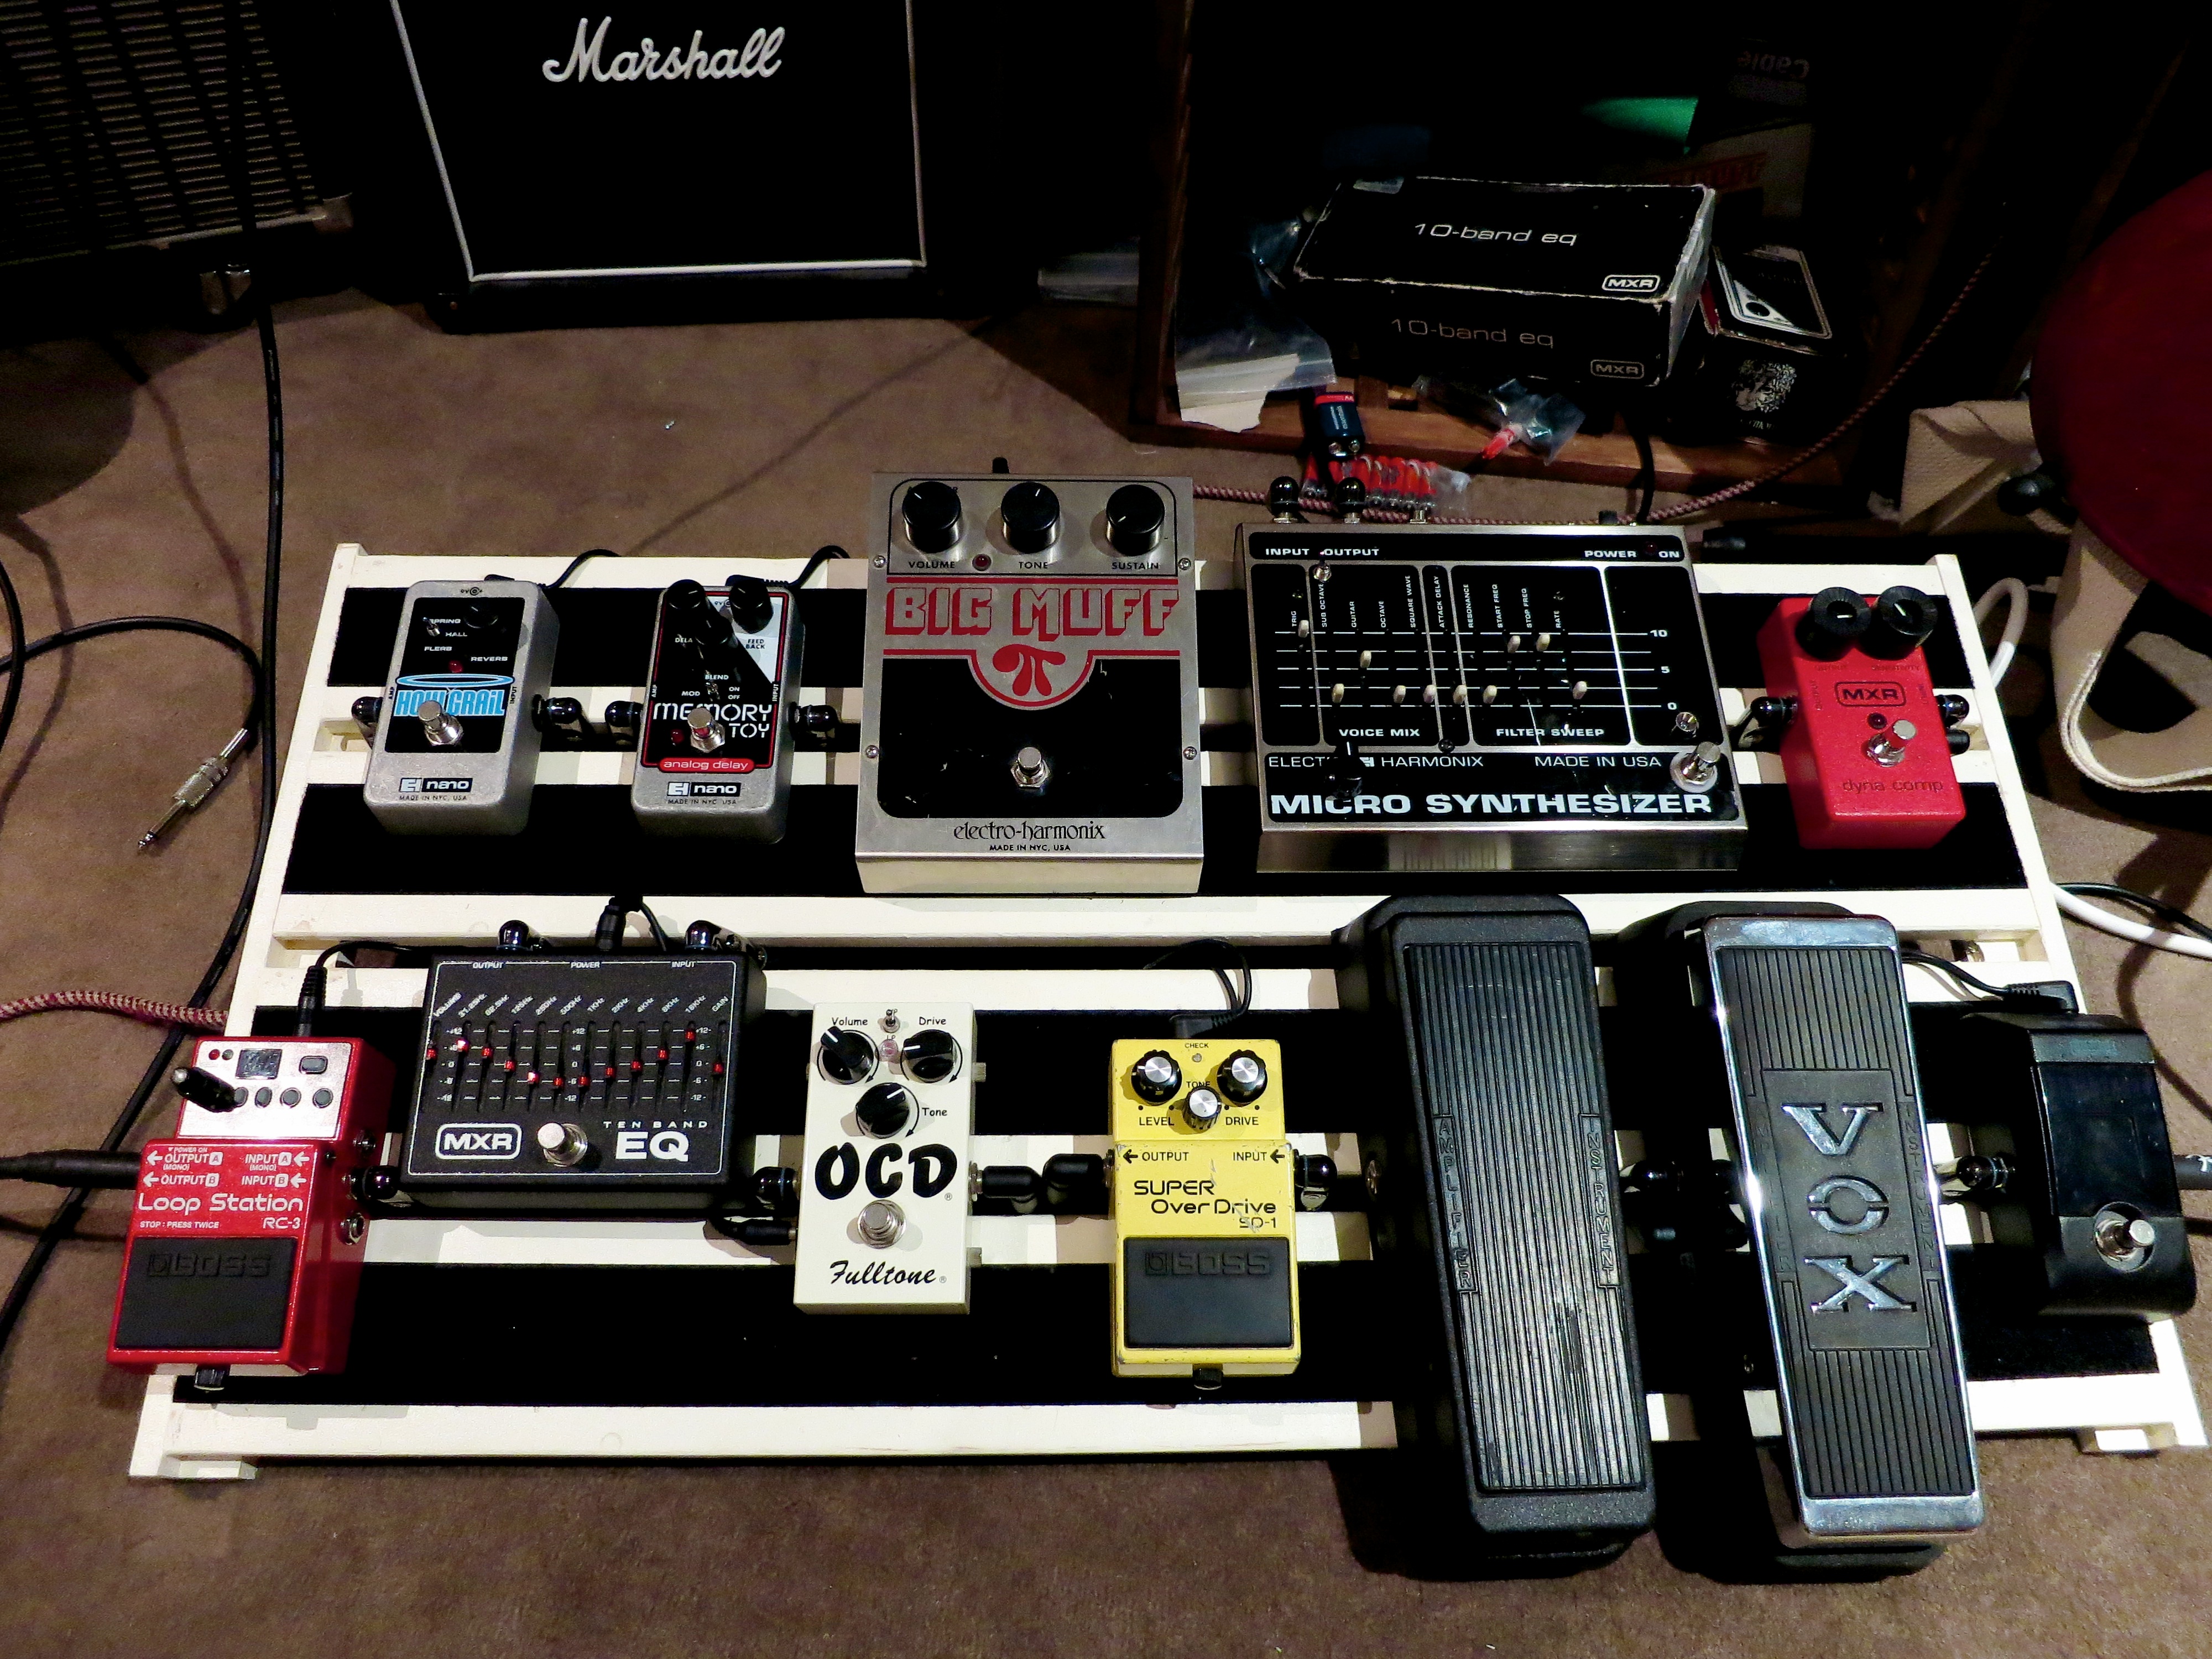
After I had done this step I placed the pedals flat on the board to get an idea of how much space I would have. I decided that the board was too large for the amount of pedals I had and decided to saw off one of the planks from the main board. Had I known this before I could’ve saved myself having to saw a plank off the spare board. Note in the picture the board now has 4 instead of 5 planks.

The next step is to get out your velcro tape. You should have enough tape for both the pedalboard and for each of the pedals. Cut strips of the soft, fuzzy velcro and attach it carefully to each plank on the board. If you’re as anal as me then you will try to place the tape as symmetrically as possible. I only taped the middle of each plank and left room on either side so more of the white finish would be visible.

After you have carefully applied the soft velcro tape to the board it is time to attach the sharp, hook velcro tape to the bases of each pedal. But before you do this make sure to take off any rubber feet glued to the pedals. BOSS pedals in particular have a rather thick rubber padding on the bottom, which should be removed.

You might have a hard time defacing your pedals like this, but know that these rubber feet are no longer necessary and will only get in the way of securing a strong connection with the velcro tape. If resale value is a concern of yours, you can keep the rubber feet in a zip lock bag. Now it is time to measure the length of tape needed for each pedal, and then you can start cutting strips.

Once you’ve cut the hook side velcro tape you simply stick it on the back of each pedal. You might be wondering what those weird robot ear looking things are coming out of my pedals. Those are connectors for my patch cables which I’ll be making myself with a patch cable kit. This step is entirely optional and if you have patch cables laying around already you can just use those.

But for this project I wanted the least amount of cable as was needed to fit the board, and I was tired of the cheap cables I was using before that resulted in lots of noise in my chain. I chose to go with right angle cables to save space between each pedal as well.

Making your own cables usually requires a soldering iron and soldering skills. But you can buy solderless cable kits that include a certain length of cable, a cable cutter, and a bunch of connector points. The kit I purchased from Planet Waves includes all of the above, and making cables is as easy as measuring the length you need, cutting the cable, putting it inside the connector, and screwing it shut with a small flat head screwdriver.

Now all that’s left to do is to place the pedals on the board in the order you want to have them, keeping in mind that generally tuners go first, followed by filters (wah, auto wah, envelope filters), then compressors, then overdrives, then modulation (chorus, tremolo, flangers, phasers), then volume pedals, then delays, and finally reverb. EQs are generally placed either before or after the overdrive. I prefer them after.
Be sure to put the very first pedal in the chain on the very far right or left of the board, and the last pedal in the chain on the edge of the opposite side. This is so you can easily plug your guitar into one side of the pedal board and plug your amp into the other. Why not the other way? Because inputs for pedals are always on the right side of the pedal, while the outputs are on the left side.
Once you’ve decided on the perfect layout for your pedals – one which results in the least amount of cable distance between each pedal in the chain – it’s time to start cutting the cables to length and attaching them to each pedal. It’s best to use right angle rather than straight angle connectors, so they can be hidden inside the gaps in between each plank of wood, which saves space and looks less cluttered.
You will also want to attach the spare plank to the back of the board now and hammer it in place with some nails. A screwdriver can also work, but be careful not to use screws too big, as they can split the wood.

Lastly, attach a powerboard to the underside of the pedalboard (use any velcro tape you have left) and plug all of your power adaptors into it. Ideally you should get a single power adaptor with a high energy output (1000msa or higher) and a daisy chain, so you can power all of your pedals with the one adaptor.
If you like you can also attach rubber feet to the bottom of the board to give it a little extra height and some added support. You can also get a strip of wood and nail it into the underside to give the thing some more stability.
And there you have it, a fully functional, personally customised, and cheap pedalboard!
Other gear related guides
